

This month I started with a very brief version of the Pastel Over Watermedia. Much like my demonstration will be at the Mountain Art Center at the end of May.
I used a cold pressed watercolor taped to a chunk of foam core. It was a revelation! I was taught to put a pat of newspapers under the paper for than nice bounce that makes pastels push much better than on a hard surface. Fit my easel and was nice and soft.
After sketching from my photo, I make sure the resulting drawing DEFINES THE EDGES that I need to keep track of as the painting progresses.
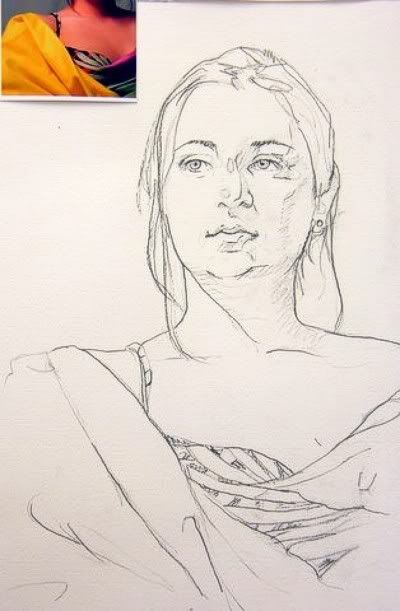
The less lines the better. It is going to get lost anyway! Because I am going to saturate and scrub the under-painting, I did use some workable fixative but this was in graphite. Graphite has a lot of durability that charcoal does not. It is a bane in oils and slippery but when you see what we do with it, you understand.
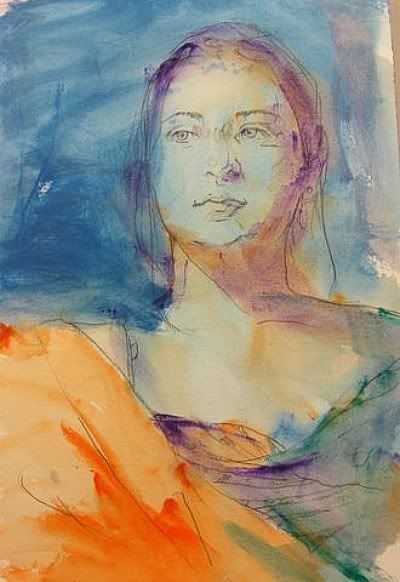
Next I scrub... and I LIKE to scrub... my under-painting of inexpensive acrylics. I use up the old and nasty stuff for this. I also like it, because I keep throwing out the hard and dead tubes as I prep for the demonstration. One can acquire a few too many paints.
In the class I explain the under-painting does three things: Individually or all at once, the colors you put on can support the values, by darkening areas that you want to go dark, complement colors for extra vibrancy or intensify a color using analogous hues. I have done a little of everything in this:
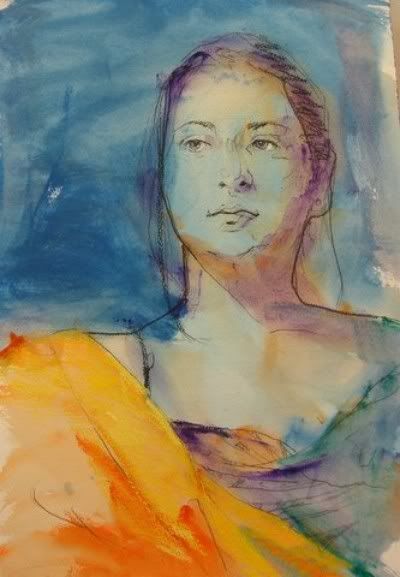
I ran into the ladies room (because I forgot my hair dryer) and using the hand dryer in there, made sure all the water was out of the paper. This works best when SCRUBBED into the surface. This demonstration came out much lighter than I had intended so I will have a darker general appearance, as I have to build up darks to give the appearance of lighter. (I use inexpensive NuPastels for about 85% of the piece before the light bright soft pastels, and the contrast is what makes us see light and dark.) THEN I reinforced the drawing with compressed charcoal or pastel.
Even light edges that touch other light edges but have major color changes are good to map out. My other trick is a transparent tracing paper sketch that can flip back and forth to correct from. As a solo painter, it keeps me from walking over to visit the neighbors in the middle of the night for a fresh eye!!!
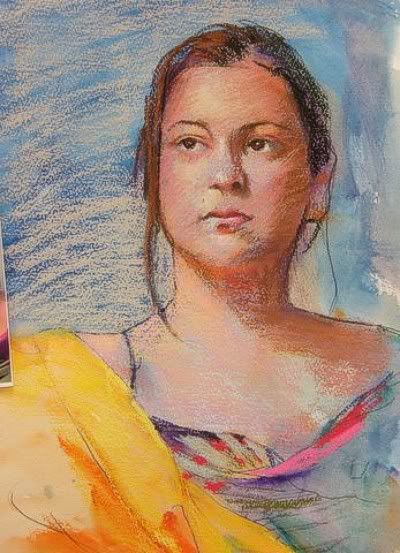
Class began progressing and I talked a bit and forgot to shoot much, but the first thing I did above was limit my value range by finding the lightest part of the painting - in this case her eyes - and the darkest part near by. I make a note with a stick and DON'T ever use white or black. In this case it was a yellow butter color and green.... yes I used great for her blue eyes, because it was dark.... then I started trying to lay in my shadows and general tones.
I endeared myself to the class by admitting I goofed! The sticks I had on hand were ALL very middle values. Few strong darks and almost no light flesh tones. I got to show how to improvise.
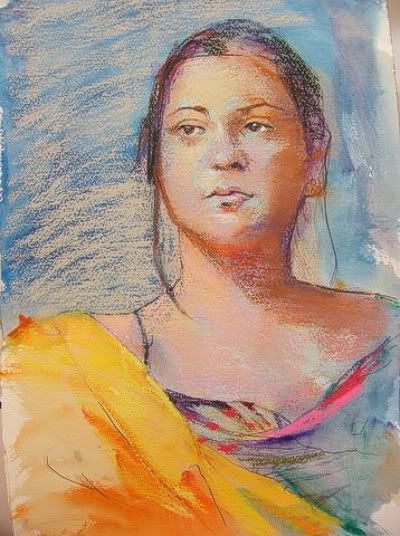
If you don't have the right stick, you can literally mix colors. In the light areas of the skin, I used a lot of that buttery yellow OVER the darker pinks to actually make lighter colors. When the colors are too strong but you don't have the proper gray tones, or too light or even too dark, a good five or six simple gray sticks will work to lower intensity and control values. Using colored lights AND a light gray I was able to start blending up in the skin while beginning to darken the shadows with browns.
At the end of the demo, I was able to sit IN FRONT of my piece and start rethinking some of the drawing issues I had lost with the initial chalking in.
The gang went wild. I must say I was over at the sink encouraging splashing and slopping of the under-painting and that fear of losing the image was very intimidating, but it was quite well received.
Next week, I will try to finish up and show how to use fixative as a tool and when to hit the big guns (and money) with the buttery soft pastels. I could see their brains start to wrap around the idea in the students that attempted it
Back next week or next pastel!
No comments:
Post a Comment